Pages

Showing posts with label Iron Chef Challenge. Show all posts

Friday, March 23, 2012

Yeast Doughuts

Yeast is the theme for this month's Red Star Yeast Iron Chef Challenge from Ott,A


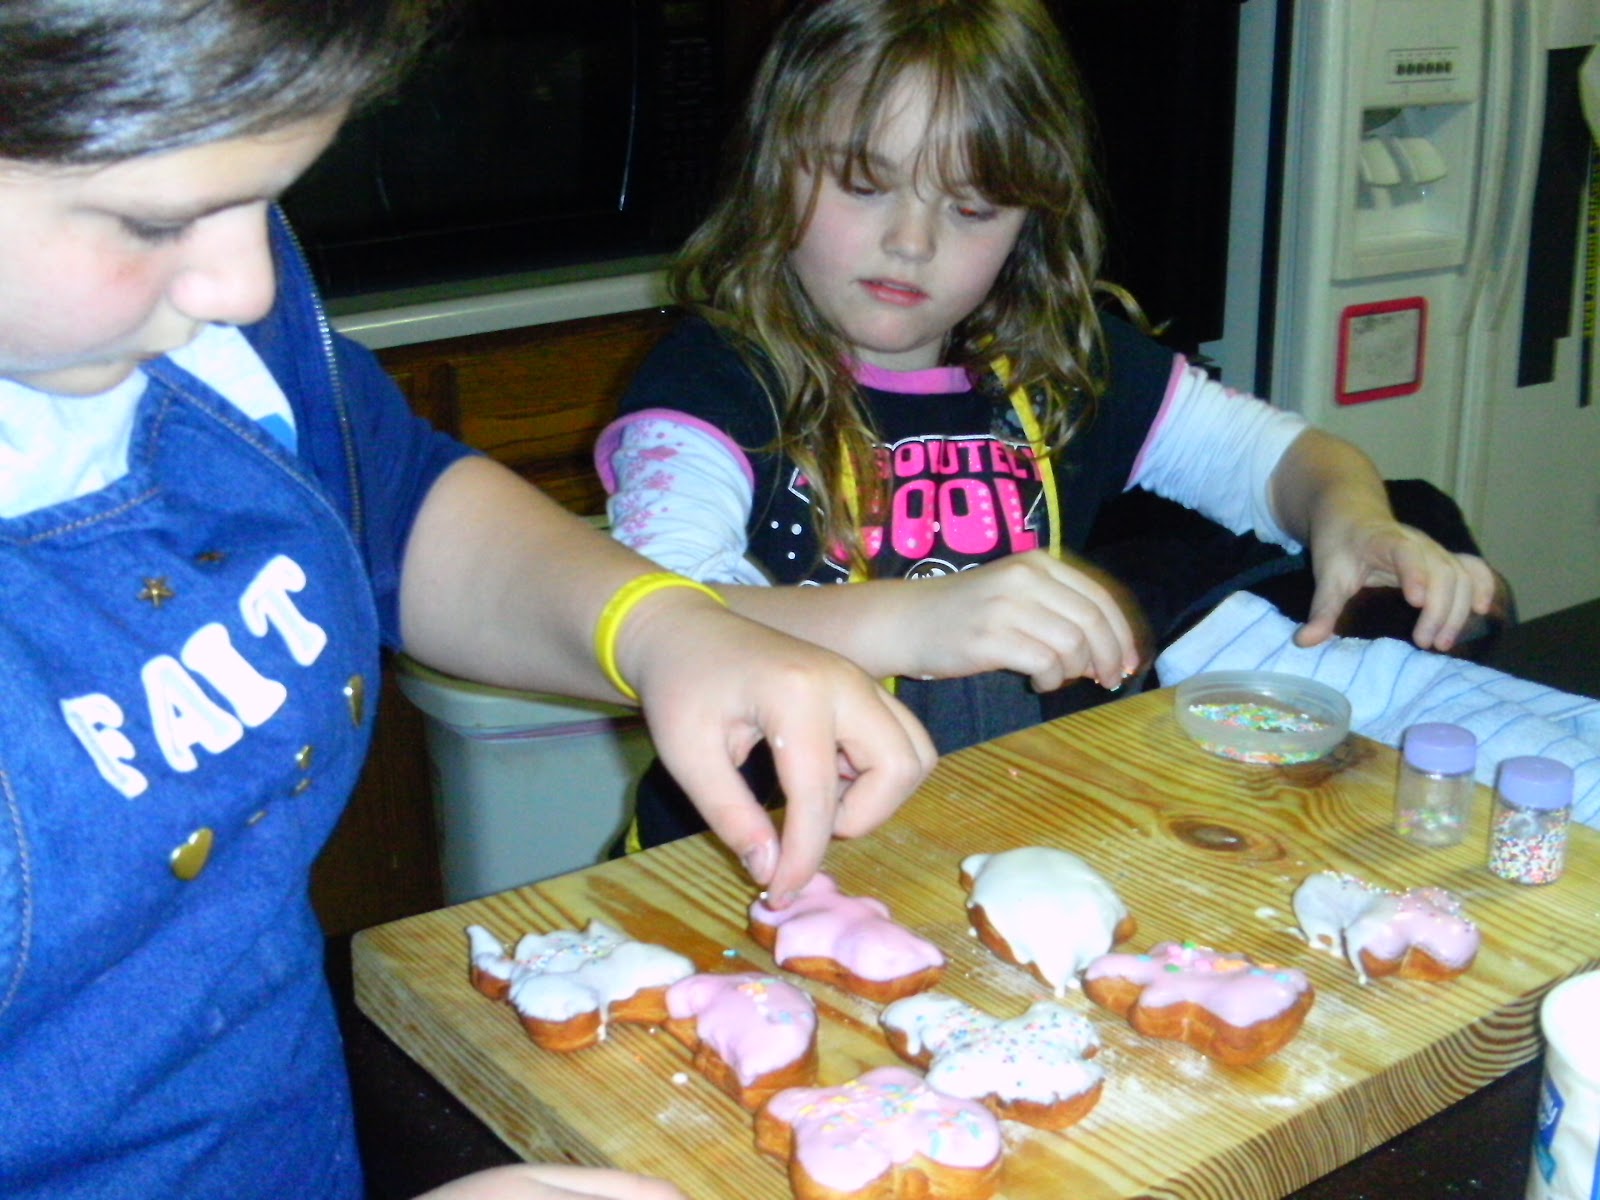
I figured this would be a good time for a quick science lesson with the kids, but I knew I had to make it fun. What's more fun than doughnuts?! 

This is a recipe that I had written down in my recipe drawer. I'm not sure where it came from, but I have notes written all over it with my adjustments from each time I make it. I think we finally have it nailed down to our tastes now!

What you'll need: 

  • 3/4 cup milk, scalded
  • 1/3 cup sugar
  • 1/4 teaspoon salt
  • 1 (.25 ounce) envelope active dry yeast
  • 1/4 cup warm water with a pinch of sugar
  • 4 cups sifted all-purpose flour
  • 1 teaspoon vanilla
  • 1/3 cup butter, softened
  • 2 eggs
  • oil
  •  
In a medium bowl, stir together the scalded milk, sugar, and salt. Set aside to cool. In your mixing bowl, mix vanilla and 2 c flour with the milk, and beat until well blended.

In a small bowl, dissolve the yeast in warm water with a pinch of sugar. This is where the science lesson comes in. The kids are amazed that the little packet actually contains live organisms! They were a little freaked out when I first told them it was fungus, but they got over it when they realized those fungi digested the sugars in the dough and made carbon dioxide bubbles, which made the doughnuts rise and get all fluffy, which of course led to several yeast fart jokes. Girls...sometimes they're worse than boys! 
Add to mixing bowl, then add butter and eggs. When that's fully mixed, add in the rest of the flour slowly. Switch out the paddle for a dough hook (or knead by hand) about 4 minutes. Move dough to oiled bowl, cover, and let rise 30 minutes. Next, roll out dough to about 1/2" and cut into circles (or use random cookie cutters like we did). Let rest for 30 minutes, covered. 


Heat one inch of oil in a cast iron skillet to 375 degrees. Fry donuts a few at a time. Cook a few minutes on each side, until they're golden. Set on rack to drain. While still warm, dip into melted frosting and add sprinkles, coconut flakes, bacon pieces, etc. 

Now the only step left is to eat!


Thanks Red Star yeast and Ott,A for another Iron Chef Challenge!


Monday, February 20, 2012

Made From Scratch Tuesday 2/21

It's time for another Iron Chef Challenge from Ott,A! Maple Leaf Farms is sponsoring another round of Iron Chef with the theme ingredient Duck.


Last year, I did several duck recipes. So while searching for some inspiration, I came across their sausage recipe and I was intrigued. I set off to make duck sausage! My local grocery store doesn't sell ground duck, so I started with a whole duck, cut it up and did a fresh grind. (I saved some of the skin so I could render the fat and used the carcass to make stock)

To the fresh ground duck, I added 2 1/2 T onion flakes, 1 T toasted fennel seeds, 1 T sage, 2 cloves of garlic (chopped fine), 1 T breadcrumbs, 2 T rendered fat, and salt and pepper. 


Mix well and shape into patties on parchment paper. Wrap tightly and freeze about 4 hours. 


To cook, place sausages on baking sheet in a cold oven and turn the oven to 325. Bake about 30 minutes, or until cooked through. 

We enjoyed our duck sausage with english muffins and scrambled eggs with feta cheese and green onions!


Make sure to enter your duck recipes over with Ott,A. And check out Maple Leaf Farms for your duck needs!


Now it's time to link up all of your creations!
Here are the rules:
1. You can link up as many posts as you'd like.
2. The post has to be made from scratch.
3. The post you link up MUST CONTAIN A RECIPE! 
4. If you want to put my button somewhere, that'd be cool. You can grab the code for the Made From Scratch Tuesday button on the top right of my sidebar. 


Photobucket

Sunday, January 22, 2012

Iron Chef Challenge-King's Hawaiian Bread

We love King's Hawaiian Bread in this house! They're the perfect size for sandwiches for the kids and they are so tasty with a bowl of soup. So when I heard Ott,A's January Iron Chef Challenge was King's Hawaiian Bread, I didn't have to look far for the theme ingredient.

Sweet and Savory Stuffing

4 Kings Hawaiian Rolls
1/2 c stock (I made this with cornish hens, so I used chicken)
1/2 c carrots, diced
1/2 c celery, diced
1 medium onion, diced
1 avocado, diced
2 tablespoons olive oil
1/2 t thyme
1/2 t basil
1/2 t rosemary
salt and pepper

Saute the carrots, celery, and onion in the olive oil
While they are cooking, tear the rolls apart and place in an 8x8 pan. Lightly toast under the broiler. 
Add in avocados and stock
Toss in sauteed celery, carrots and onions. Toss in seasonings and bake at 350 35-45 minutes. 


Thanks to Ott,A and King's Hawaiian Bread for sponsoring this month's challenge!

Thursday, December 15, 2011

December's Iron Chef Challenge

 All year long, Ott,A has challenged us with monthly recipe contests. December's challenge, sponsored by Taste of Home, challenges the winners from the entire year to make the same product using the same recipe (cinnamon raisin bread) and create a new dish using the finished product.


First, I made the bread
While the husband ate the second loaf, I brainstormed some recipe ideas. I came up with two and made them both. The first one was not so great. Good thing the second one was quite tasty!

Herb Crusted Stuffed Hens

What you'll need:
2 Cornish Game Hens (I bought frozen, so make sure they're completely thawed. Fresh ones generally have giblets inside, so be sure to remove those first)
1/2 loaf Cinnamon Raisin Bread, cut into 1/2" cubes (Fresh from the oven bread won't work as well for stuffing, so I made these 2 days after I baked the bread)
1/2 c chicken stock (I make my own, so it's full of onion, carrot and celery as well)
1/4 c carrots, diced very small
Equal parts savory, rosemary, sage
3 parts Thyme
Salt and pepper

Mix all seasonings/herbs in a small bowl and set aside. Prepare hens by rinsing thoroughly.
In a medium bowl, mix together cubed bread and 1 1/2 t of the seasoning mixture. Toss well.
Add in carrots, pour stock over bread, mix well and stuff birds.
Take the remaining seasoning mixture and coat the hens well.
Bake at 375 until a meat thermometer reads 180 when inserted in the middle of the thigh (about an hour). The meat is done when the juices run clear and the wings and legs move freely. If skin starts browning too much, make a tent with aluminum foil and cover the hens. Because stuffing can be a potential bacteria hangout, make sure it's cooked thoroughly!

The skin was so crispy and full of the wonderful flavors of the herbs!
The stuffing soaks up the earthy flavor of the herbs and a tasty juices from the poultry, while the meat absorbs the cinnamon and raisin flavors. It all makes for a surprising and wonderful combination!

Thanks to Taste of Home for sponsoring December's Iron Chef Challenge and to Ott,A for a great year of challenges!

From Mess Hall to Bistro-Iron Chef Challenge entries

January Maple Leaf Farms (Duck)
February American Lamb (Lamb)
March Red Gold (Tomatoes)
April Clabber Girl (Baking Powder)

June Dean's and Kelsay Farms (Milk)
July King Arthur (Flour)
September Red Star (Yeast)
October Ocean Mist Farms (Artichokes)

Thursday, October 27, 2011

Artichoke and Spinach Pizza

The theme ingredient for this month's Iron Chef Challenge is artichoke. I'll be the first to admit artichoke is not a vegetable I cook often. Don't get me wrong; I love artichoke. I just never cook it. The husband, on the other hand, is not an artichoke fan. I "forgot" to tell him I put artichoke hearts on this dish and  he raved about it! Go figure.
Photobucket

Spinach and Artichoke Pizza
What you'll need:
Artichoke hearts
Spinach
Fontina Cheese
Romano Cheese
Olive Oil
Red Onions
Pizza crusts (I used sandwich-style flat bread because it's like two circles joined together and I thought they'd make cute mini pizzas!)


First, I steamed the artichokes and cut up the hearts. Don't worry, I didn't throw the rest of the artichoke away. I munched on it while I was waiting for the pizzas to cook! (The best way to munch on artichokes is to have a small dish with melted butter and salt handy!!)

To assemble the pizzas, drizzle the crust with just a bit of olive oil and add sliced red onions. I'm a cheese person, so I added a little bit of the Fontina cheese here too!

Next, pile on the spinach and artichoke!
Top with more Fontina and Romano cheese
 Bake at 400 until the cheese has completely melted (8-10 minutes) and serve!


 These pizzas were delicious! Artichoke and spinach are a perfect match and the red onions provide just a bit of crunch to make it interesting!

A big thanks to Ott,A and Ocean Mist Farms for sponsoring this Iron Chef Challenge!


Make sure to visit the fantastic blog parties on my sidebar, and of course, link up all your made from scratch recipes on my Tuesday linky-Made From Scratch Tuesday!


Photobucket

Friday, September 16, 2011

Homemade Root Beer

Come join the fun at the My Baking Addiction and GoodLife Eats Holiday Recipe Swap sponsored by Red Star Yeast

 If I was a planner, which we all know I'm not, I totally would have made some beer.
Since I didn't have time to make beer, I made root beer!

I looked around a bit and it seemed to be fairly simple. You'll need:

an empty 2 liter bottle
1 c sugar
1 Tablespoon + 1 teaspoon root beer extract
1/4 t yeast
water

To start, place a funnel in the top of the bottle. Add sugar and yeast.

Swirl around to mix together. Next add root beer extract.

Add in about 3 cups of water and mix well.

Finally fill the bottle to almost the top. You'll want to leave about 1" to 1 1/2" headspace. Tighten cap and let sit at room temperature until you can no longer squeeze the bottle. Depending on what kind of yeast you're using, it could be 6 to 48 hours. I used Red Star Quick Rise yeast, so it took just about 6 hours for the bottle to be ready. See all the carbon dioxide bubbles formed by the yeast?! That's how this root beer gets the carbonation.

When you can't squeeze the bottle anymore, refrigerate over night. Now it's ready to drink!
The root beer went over great at our bonfire this weekend! The whole bottle was empty before I knew it! At one point, a couple of our guests even hid the bottle so they could have the rest! I think I may have inspired these two to start making their own sodas.


If root beer isn't your drink of choice, what about ginger ale?
To make ginger ale, you'll need:

2 T fresh grated ginger
1/4 teaspoon yeast
juice of one lemon
1 c sugar
water


Pour sugar and yeast into bottle. Swirl around. Mix the ginger and lemon juice together to make a slurry.


 Add slurry to the bottle. I used a kabob skewer to push it through my funnel.


Add water and shake bottle until mixed. Let it sit out at room temperature until you cannot squeeze the bottle. Refrigerate over night. Enjoy!
Photobucket


Friday, July 15, 2011

Cooking with King Arthur Flour

Ott,A is back this month with another Iron Chef Challenge. This month's sponsor is King Arthur Flour.
Photobucket

I picked up a bag of Unbleached All Purpose flour. Not all AP flours are created equally. King Arthur AP flour contains 11.7% protein. Why is that important? Check out this page for a basic breakdown.

Now that we're done with the Science lesson for the day...on to the cooking! I got the KitchenAid pasta roller and cutter set earlier this month and I've been dying to try it out. I used their basic egg noodle recipe below:

Ingredients:


4 large eggs

1 tablespoon water

3 cups sifted all-purpose flour

1/2 t salt

Directions:

Place ingredients in bowl, attach flat beater, turn to speed 2 and mix 30 seconds.

Remove the flat beater and attach the dough hook. Turn to speed 2 and knead for two minutes.

Hand-knead dough for 30 seconds to one minute. Cover dough with a dry towel and let rest 15 minutes before extruding it through pasta maker.


I ran it through to a thickness of "4". Next time, I'll probably go to 5 or 6, but it worked out just fine at a 4. Next, run to the fettuccini cutter. Then let dry for up to one hour. Check out this awesome drying rack my dad made for me! He's one of those "do it bigger and better" types, so when he saw the single tier rack sold in the stores, he decided he could make one bigger and better. He certainly did! It's made from quality hardwood and coated in a food grade seal.

I dried and froze my pasta overnight, so it took about 8 minutes to cook. Fresh rolled pasta cooks in under 5.
For the sauce....

1 cup dry white wine
4-5 large tomatos-blanced, peeled and cut
1/2 cup extra virgin olive oil
1 cup chopped white onion
fresh oregano, thyme, rosemary and basil....be generous!
1 bay leaf
2 cloves crushed garlic or 2 cloves minced garlic
salt to taste
Combine all ingredients in large skillet over medium-low heat. Cook, covered, until onion is tender.


Toss cooked and drained pasta in sauce. 


We opted to add chicken and fresh mozzarella...two thumbs up from the crowd!

Make sure to visit the fantastic blog parties on my sidebar, and of course, link up all your made from scratch recipes on my Tuesday linky-Made From Scratch Tuesday!


Photobucket
King Arthur provided me with a coupon for a free sack of flour. However, the ideas and opinions expressed above are my own.