Pages

Wednesday, November 18, 2015

Cheesy Chicken and Kale

Sometimes Pinterest is my Google. Seriously, I often feel like my phone should come with an option to say "OK, Pinterest....show me recipes using chicken, kale, garlic and cheese." And yesterday was one of those times. I was trying to decide what to fix for dinner, so I just typed in the ingredients I wanted to use and behold...all of these great recipes came up!


One immediately caught my eye. It's probably because I could see all the cheesy goodness. I used her recipe as a starting point for dinner. It sounded so good and I figured I could make some changes to suit our tastes, and switch out the pasta for spaghetti squash, Ugh, giving up pasta is hard.

What you'll need:

2 lbs chicken breast, cut into bite size pieces
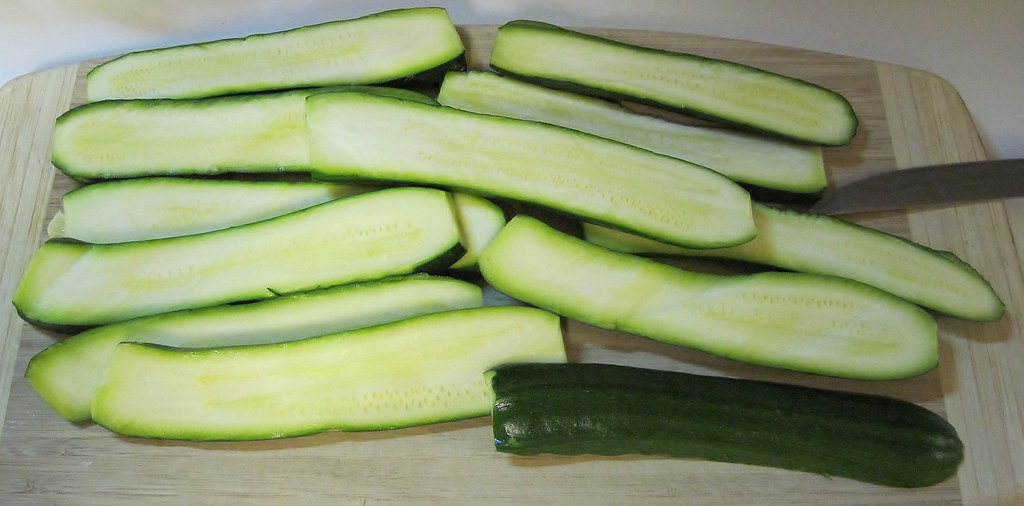
1 large spaghetti squash
1 medium onion, diced
2 Tablespoons minced garlic
2 Tablespoons Italian seasoning
1 c chicken stock
1-2 Tablespoons butter
1-2 Tablespoons flour (equal amounts of butter and flour)
5 ounces baby kale, cut into manageable pieces
2 c Italian blend shredded cheese
Milk
Salt, pepper, red pepper flakes to taste

So I started by getting the spaghetti squash in the oven. I used a rather large one knowing I was feeding 2 teenage boys and my husband as well. I generally cook for 8 so we have plenty for dinner and for lunch the next day. After the spaghetti squash had been in the oven for about 30 minutes, I started in on the rest of the ingredients. First-saute onions in some olive oil.


After about 5 minutes, I added in some garlic and let that simmer for another few minutes. Then the chicken and herbs.


I let that go until the chicken was no longer pink on the outside. By this time, the spaghetti squash was done, so I pulled it out of the oven so it could cool enough for me to touch it.


Back to the chicken....
Push all the meat to one side of the pan and drop in a tablespoon or two of butter and let it melt, then whisk in an equal amount of flour and let that cook until it stiffens up. Add in about a cup of chicken stock and mix everything together in the pan. Keeping a simmer going, add in the kale and the cheese. After a couple of minutes, the sauce will start to thicken. Add milk until it's nice and creamy. Then add in the spaghetti squash and make a mess all over the stove top as you stir it all together. A final seasoning with salt, pepper and some red pepper flakes and it's ready to go.

I was going to add in some spinach too at this point, but I decided since we were having a salad with it and there was spinach in the salad, that was probably enough. Next time I make this, I'm going to toss in some capers though. The brininess would be perfect in here! But even without the capers, dinner was a hit with everyone. There was just enough left for the husband and I to have lunch today.


Monday, November 16, 2015

DIY Outdoor Christmas Tree Decorations

I managed to make it half way though November before the Christmas decorations came out. That's some sort of record for me. Because the husband and I are both still kids when it comes to Christmas, we have to set a limit on how many decorations we buy each year, and that includes lights. This year, he opted to buy a few of the inflatable outdoor decorations, and we had to retire a couple, so it really didn't feel like we added anything this year. While we were out shopping this weekend, we saw some outdoor decorations for sale that I knew we could make ourselves. The decorations were basically tomato cages turned upside down, then donned with tinsel, lights and some decorations. They were $9.99 each, which wasn't a bad price, but I knew we could make some with items we already had around the house, which essentially makes them free. I can do free!


I grabbed three tomato cages from the garage. We had a few that have been through many garden seasons and were starting to fall apart, literally. I figured these would be perfect for this because I don't have to undo it all to use them again in the spring. But, with just a few snips, they could be ready to go for garden use if we needed to.

Mine were a bit mangled, so I started by straightening them as much as I could, then flipped it upside down and tied the top together with zip ties. Have I mentioned I love zip ties? I think half of our house/garage/chicken coops/fencing is held together with zip ties.

Next, add the lights and tinsel, wrapping around the "trees", securing with zip ties along the way. Then add your ornaments and a tree topper. We used star ornaments as the tree toppers.


All that's left is to trip the zip ties. They look like something out of a Dr. Seuss book at this point, but that's ok. Once they are outside and turned on, no one will notice. 


The last step is to take them out and plug them in!


Friday, November 13, 2015

Lightened Up Casserole

One of my favorite comfort foods is chicken and broccoli casserole. It doesn't matter what time of year it is or what the temperature is outside, that's the one meal that always hits the spot for me. And the best part is it's made from leftovers.

Last night I was trying to figure out what to make with the leftover turkey breast I had, it came to me that I could fairly easily tweak the chicken and broccoli casserole recipe to make it work with the turkey, and lighten it up in the process. Today I entered the ingredients into the Recipe Calculator to see what the nutritional difference was between the original recipe and the new version. The amounts may be slightly different, but for the quick comparison, it will do. Here's the original recipe:


And the Nutrition Information

For this version, here are the swaps I made: 
1 roasted turkey breast for the chicken
1 egg beaten in place of the mayo
1 roasted spaghetti squash in place of the rice
3 slices of cheddar cheese in place of the colby jack
1/2 c riced and roasted cauliflower in place of the breadcrumbs

Check out the new nutrition information: 

These swaps cut out over 100 calories, 16 g of fat and 20 carbs per serving!! That's not to mention all of the increased vitamins and minerals!


Monday, October 19, 2015

Raised Trench Carrot Harvest

Last year we grew the most delicious carrots. The problem was we left more carrots in the ground than we actually brought up. I don't know what the secret is to digging up carrots without breaking them and never did figure it out. This year, I knew we wanted to have our own carrots again, but we had to figure out a better way to harvest them. After thinking about it, we came up with the idea to build boxes that would act as raised trenches. Oxymoron, I know. But that was the best term I could think of to describe what we were doing.

We stared by building boxes out of 1x6's, adding square supports in the corners. Each board is attached with screws so we can easily take the boxes apart at harvest. We used untreated wood knowing the boxes would probably only last a year or two.


Before placing them in the garden, we dug out a trench about 3 inches deep so the boxes would be partially below ground level. Then we filled them up with dirt and planted the carrot seeds.


Then we patiently wait all summer while everything else grows and the carrots take their time. I'd like to saw we did an excellent job pulling weeds and all that maintenance stuff, but it didn't happen. At some point during the late summer, we realized that the critters (rabbits maybe?) got into the garden, which is completely fenced in with chicken wire. They found one row of carrots and completely devoured all the plants. Yep, an entire row of carrots-gone. They had got into the second row, but not all the way. I don't know what stopped them, but I was glad we were going to have a least a few carrots. Fast forward to mid October and the looming first frost. It's time to harvest the carrots!

I sent the husband out to take the screws off the corners. Don't mind the massively overgrown weeds all around. 

After the top board was removed, we could start to see some decent looking carrots.

After removing the bottom board, we just pushed the rest of the box backward so it was easy to move the dirt away and grab the carrots.


After a quick rinse and trim, we ended up with a decent amount of carrots. Next year, I'm thinking about adding chicken wire over the top of the boxes so the critters can't get in there and dig up the veggies!

Friday, September 4, 2015

Fried Cupcake Squash

As much as I love all things fall, it's always disappointing to see the end of the gardening season. We still have a few things left, so we're savoring them as long as possible! Since the cupcake squash were a new addition this year, we're still looking for different ways to fix them. The other night as I was staring at them, I wondered if they could be fried like zucchini. I mean if you can fry oreos, Pepsi, green beans, and butter, why not cupcake squash?

While the oil was heating in my cast iron pan, I set up my assembly line of frying essentials.


First is the flour. I used whole wheat and seasoned it with Italian seasoning and salt. Next, a couple of eggs--scrambled. The last bowl is breadcrumbs. I used a mixture of panko and some of my random frozen bread crumbs. (Whenever we have bread or crackers that start go to stale, I run them through the food processor and add it to the bag in the freezer. Currently, there is a mixture of whole wheat rolls, rye bread, and multigrain crackers.)

And I cut up the squash. I sliced it, then cut the slices into quarters just to make the frying process easier.

When the oil was about 325 degrees, I dropped the coated pieces in. I used my smallest cast iron pan for this because I like to work in small batches and I think it keeps the oil at a more consistent temperature. About 3 minutes per side was perfect for these.


After each side gets a nice golden color, set them on the rack and add some finishing salt.


The cupcake squash really have two very distinct phases. When we first pick them, the seeds are still very soft and more like zucchini. But as they ripen, the seeds and the inner flesh become more like typical fall squash. The late/ripened squash are much better suited to scooping out the seeds before cooking. Fried cupcake squash really needs to be made with the earlier squash where the flesh and seeds are still very tender and juicy.

Monday, August 24, 2015

Roasted Cupcake Squash and Brussels Sprouts

It's been a crazy gardening season. It started out so much cooler than usual, which wreaked havoc on all the plants that thrive in warmer weather. Then it rained. And rained. I'm fairly certain I saw Noah go by. Then it finally remembered it was summer and warm weather came. The zucchini did great. We have been eating zucchini daily for about 2 months and I was able to freeze a lot too. The corn didn't fare as well. All of the rain completely flooded out the green beans-not a single plant survived. And because of the super soaked soil, the weeds took over nearly everything else. The one bring spot was the cupcake squash. I was concerned at first because when the cooler weather decided to stick around for a few weeks, we only had male flowers-no fruit. But soon, we had so many I couldn't keep up with them.

If you haven't seen cupcake squash yet, here's what they look like.


They're about the size of an onion and taste similar to zucchini, but with a nutty taste. And like zucchini, if you don't pick them on a regular basis, they will grow to amazingly large size! We had a few that were missed and ended up about the size of my head! We like to add them to salads raw, but my favorite way to eat them is roasted.

Roasted Cupcake Squash and Brussels Sprouts

Preheat oven to 400 degrees. On a baking sheet, toss together brussels sprouts (cut in half, long ways), sliced squash, olive oil and salt. I used olive oil infused with Italian seasoning and garlic.


Roast until veggies are tender, about 30-45 minutes, stirring around about half way through.

When veggies turn a light golden brown, they're ready. Finish off with some pepper.


I like the squash by itself, but pairing with brussels sprouts is the best combination! They hold up really well to roasting, much better than other summer squash, but still have a delicate taste. We're just about to the end of this growing season, so I don't have too many more of these left. They will absolutely make it into next year's garden.

Thursday, August 13, 2015

Chicken Parm with Zoodles

Anyone else have mountains of zucchini that seem to multiply daily? Even eating zucchini on a daily basis doesn't seem to make a dent in the amount we have! And really, after eating it daily for 5 or 6 weeks, you have to figure out some new ways to cook it. We've been using zucchini in place of pasta for spaghetti and lasagna, but last night we decided to try making Chicken Parmesan with the zoodles. One word.....yum! It was such a great combination! 


For the chicken.....

Chicken breast, cut into thin pieces (about a pound)
1 c bread crumbs
1 egg
1/4 c Parmesan cheese
2 T Italian seasoning
Salt
Flour

Preheat a large skillet on about medium heat and add just enough olive oil to coat the bottom of the pan.
In a large ziploc bag, mix bread crumbs, cheese, Italian seasoning and salt. Dust chicken with flour, dip in egg, then toss into bag until chicken is coated. Pan fry until chicken is cooked through, then place in an oven to keep warm. Just before serving, top with additional cheese and put back in the oven until it melts.

For the sauce....

2 c tomato sauce
1 onion, diced
4 teaspoons minced garlic
2 T Italian seasoning
Salt and pepper to taste

Saute the garlic and onion until soft in a medium pan with some olive oil. Stir in tomato sauce, Italian seasoning, salt and pepper. Keep on low until ready to serve, stirring occasionally.

For the zoodles....

4 medium zucchini
2 T butter
1/4 c Parmesan cheese

Using a vegetable spiralizer, cut the zucchini into long strips.


Cook by either sauteing in a pan or by boiling for 2-3 minutes. Drain and stir in butter and cheese.

Now all that's left is to assemble your plate and enjoy! Now to figure out what to do with the  rest of the zucchini mountain.....

Tuesday, August 11, 2015

Can I be Fat AND Healthy?

The other day I saw a post on Facebook from a friend telling a cute story about her young daughter using the word "fat". My friend let her daughter know that the word "fat" isn't very nice and she should use the term "unhealthy". There was more to the story, and it was actually very cute, but the more I got to thinking about it, it actually started to bother me. I'm fat. Maybe that's not the PC term, and I'm sure I'm damaging some young girls' self esteem by making that remark, but let's be real here. I have excess amounts of fat cells around my entire body. I am fat. I'm also happy, creative, smart, witty, loved, and more importantly....healthy. I'm glad there are parents out there letting their children know that some comments are not appropriate, but to tell a child that fat = unhealthy drives me insane! Regardless of what society tells us, fat does not equal unhealthy, just as skinny does not equal healthy. Your blood pressure does not care what size your jeans are.

I am not saying we should be promoting obesity, or celebrating it. And all 222 lbs of me knows that I need to weigh less in order to maintain my long term health and my current weight is not ideal. But this fat girl has excellent blood sugar, blood pressure, and cholesterol. My oxygen efficiency is in the mid-athletic range. I run. I do strength training. I do cardio.

A good day at the gym looks like this for me:


And even the average day at the gym looks like this: 


And even a bad day at the gym looks like this: 


And every morning before 7 am, I get in at least 30 minutes of cardio. 


And my diet is amazing. I probably eat more vegetables in one day than most people do in a week. And I probably eat less refined grains in a week than most people do in a day. Processed foods are nearly absent from my diet. Instead, we eat whole foods, rich in vitamins and nutrients, focusing on seasonal and locally produced items, many of which come from our backyard.

My lunch from one day last week. Leftovers from the night before-Pork chop, asparagus and brussel sprouts. 

Part of my dinner from the other night...veggie kabobs on the grill
And I still get in my desserts because I love chocolate.

Chocolate, peanut butter "Ice cream" made from frozen bananas, peanut butter and cocoa. 

And I do all of it looking like this.

And to give some perspective, here's me 12 lbs heavier. Photos on the left are the "before". Photos on the right are 4 months later. I'm less fat now that I was before, but still healthy in both pictures.


Tuesday, May 19, 2015

Zucchini Lasagna

In my many hours of skimming pinterest, I keep seeing pins for lasagna using zucchini instead of noodles. I'll be honest-I didn't stop and actually read any of the instructions. And we all know what happens when I do that. I'm happy to report that this time wasn't quite as disastrous and now I can share the lessons I learned! I love that this is a veggie packed meal with so much flavor (and CHEESE) but nearly guilt free.

What you'll need:

2 large zucchini
1 lb boneless, skinless chicken thighs, cooked and diced
2 c fat free ricotta
6 oz baby bella mushrooms
1 medium bag of baby spinach
4 oz fresh mozzarella, sliced
2 c shredded Parmesan cheese (the good stuff, not the weird cheese like stuff in the can)
Italian seasoning to taste
Garlic powder to taste
2 Tablespoons bread crumbs (optional)

First, I cut the zucchini into long strips using a wire cheese slicer. I'm going to guess they were about 1/4" thick. They need to be study enough to hold up the filling of the lasagna, but thin enough to still cook through in the oven. Pictures would be helpful here, but hey-I'm working with afterthoughts here so we're using some Creative Commons photos.


Raw zucchini cutlets
photo by Gloria Cabada-Leman https://flic.kr/p/bpGyED 
Here's one of the things I learned after the fact....par cook the zucchini to reduce the moisture. The dish will work if you don't, but you'll have a lot of veggie water in the pan-not very appetizing. Next time I make it, I'm going to just toss these in a non stick pan for a few to draw some moisture out. I may do that with the spinach too.

Line the bottom of an 8x8 dish with strips of zucchini. Next add half of the spinach, half of the chicken, half of the mushrooms, half the ricotta, a good sprinkling of the Italian seasoning and some garlic, a third of the mozzarella and a third of the Parmesan cheese. Repeat. Top with remaining zucchini strips, cheese and bread crumbs. Bake at 375 until all the cheese is melted and center of lasagna is hot. That took about 45 minutes for me.

And the leftovers make a great lunch the next day! 


I wasn't very organized while I was making this and realized as soon as I put it in the oven that I forgot to put the mushrooms in. Oops! So I had to carefully pull back strips of zucchini to add it all in, which led to clumps of mushrooms and sections without any. Oh well...it still turned out tasty! With the healthy versions of the classic lasagna ingredients, I was able to cut the calories down to about 237 per serving! And that included the breadcrumbs. If you skip those, it would be even less. This lasagna is super cheesy and very filling.


Thursday, May 14, 2015

Getting Ready for the Next Batch of Chicks

After our first incubator hatch, we had lots of young chicks living in our basement for a few weeks. It was still a little chilly outside, so they weren't quite ready for the early spring temperatures until April. But we were finally able to move them outside into our grow out pen so they could get used to the big chickens and the big chickens could get used to seeing them around.


After a couple of weeks, we were able to let them out to explore the entire yard.


It didn't take long for each group to check the others out.

Within a couple of days, the two groups became one flock.


Maybe it was seeing the young chicks around the yard, but of course we now have 2 broody hens sitting on a total of 45 eggs! The first group should be hatching this weekend.


Most of our birds are dual purpose breeds, so with this sudden influx of birds, we will likely raise the roosters as freezer fillers and some of our older hens will join them later on this summer. We will also select the hens we want to keep for their specific traits-best layers, temperament, and markings.