Pages

Monday, January 31, 2011

Made From Scratch Tuesday 2/1

It's time for our second Made From Scratch Tuesday! Last week was a huge success and we saw so many awesome recipes (and one really cute quilt). So it's time to link up all your homemade goodies!

This weekend, we had some sick kids. I didn't get to do a whole lot of cooking, or blogging. Saturday night, we made some pizzas though. I'm usually not a fan of homemade pizza crust, but I think I've found a recipe we can all live with! I grabbed this one out of my stepdaughters cookbook we got her for Christmas. I'm pretty sure I've used that thing more than she has! We made two pizzas; one cheese for the girls and one pepperoni for the boys and me. Granted, they were all feeling puny, but there were only two pieces left when everyone was finished. I think it's safe to say they loved it as much as we did!
Here's the recipe

I had my mixer do the hard work!
 Once the dough was ready, I baked it for 10 minutes at 375, then spread on the sauce


Next came the toppings and cheese!


Then, we baked it again for about 15 minutes. It was definitely a hit with everyone!!


What goodies have you been cooking up this week? 
Here are the rules:
1. You can link up as many posts as you'd like.
2. My only content rule is it has to be made from scratch.
3. If you want to put my button somewhere, that'd be cool. You can grab the code on the top right of my sidebar.


Photobucket

After you link up here, check out Jennifer at Peas and Crayons
She has tons of recipes, DIY tutorials, and a Wednesday linky-What I Ate Wednesday!


Thursday, January 27, 2011

Almost Homemade Dinner

The other day at the store, I saw this little pouches of tortellini. The package claims to be "Dinner for 2 in 10 minutes".

Hmm...Dinner for 2...have you met my husband? He eats enough for at least 3, and I don't think he'd let me fix another meal without meat, so time to spice it up a bit!

I stared out by cooking some chicken tenderloins seasoned with some italian seasonings.


While the chicken is cooking away, time to chop up some tomatoes and pull out the spinach. We're kind of on a spinach kick since I bought the big bag and I refuse to let it go bad! 

This is a multitasking meal, so we also have to get the tortellini going. These little guys start out tiny, but double in size. Make sure you use a large pot so there's plenty of room for them to float about. 


When the chicken is cooked, chop that into bite size pieces. Using the same pan you cooked the chicken in, toss in the spinach and tomatoes and wilt the spinach. You don't want it to cook too much at this point, so just a few minutes on the heat, then turn the burner off, but leave the pan on the stove. Add the chicken back to the pan.


When the tortellini is cooked, use a slotted spoon and move it to the skillet. It's ok if you get a bit of the water in there. 


Remember the stuffed pasta?  Well, I had some of the spinach and ricotta cheese mixture left over, so this seemed like a great place to use it up. Stir in a few spoonfuls of the deliciousness to the pasta mix. 


Add another spoonful to the plate when you serve it! 

So the "Dinner for 2 in 10 minutes" ended up taking a bit longer, but on the bright side, not only was it dinner for the two of us, but there's plenty left over. And I didn't have to hear about fixing another meatless meal!

Tuesday, January 25, 2011

Grilled Sandwiches

So if you remember my last post, you'll know we have been eating lots of spinach. The other day, I decided to make some sandwiches on the grill the husband got me for Christmas. I also wanted to use some of my super yummy bread I made the day before. I heated up the grill and began preparing my sandwiches.

I started with slicing the bread and adding just a dab of olive oil to one side of each piece. Then I piled some spinach on the other side. Next I added a couple slices of roma tomato and some fresh mozzarella slices.


Put the other piece of bread on and put it on the grill until the bread was slightly toasted and the cheese had started to melt.


It was a great quick lunch, with little effort! The husband complained that there wasn't any meat, but he ate it anyway!

Monday, January 24, 2011

New Tuesday Linky

I love linky parties. I love being able to see what everyone has been up to and all the fun things they've been creating. I spend so much time chasing around everyone else's linkups, I thought it would be nice to host one on my page as well. Have you seen my sidebar? Yeah, those are the linkys I go to every day! So, here we go with the first Made From Scratch Tuesday.


Here are the rules:
1. You can link up as many posts as you'd like.
2. My only content rule is it has to be made from scratch.
3. If you want to put my button somewhere, that'd be cool. You can grab the code on the right.


I made some yummy  Tomato Herb Bread

So what have you made this week?


Sunday, January 23, 2011

Stuffed Pasta with Sausage


The other day I was out doing my grocery shopping, and Meijer had the large bags of spinach on sale cheaper than the small bags. So logically, I bought the gigantic bag. Because I hate to throw food away, we've been eating spinach with every meal. And let me tell you, I'm starting to run out of ideas here on how to cook it. But then I remembered that I picked up some chicken sausage (with garlic and mozzarella)  that would be perfect with pasta. My first thought was to do stuffed shells, but I was out of large shells. Making the most of what I had on hand, I used lasagna noodles. A little unorthodox, but it ended up being a great dinner. 

What you'll need:
3 lasagna noodles, cooked al dente 
8 oz ricotta cheese
4 cups fresh spinach
Sausage, cut into pieces
Spaghetti Sauce
Parmesan Cheese
While the noodles are cooking, put the spinach in the food processor and process until it looks like lawn clippings, as my husband likes to call it. 


Add in ricotta cheese and process until smooth.


You'll have some of this left over, but it's great to add to just about any pasta dish and it will keep for a couple days. Now, lay out one lasagna noodle and cut into thirds. Scoop about 2 tablespoons of the spinach/cheese mixture into the noodle and roll up. 


Lay in the bottom of a 9" pie plate. Repeat. Add in sausage. 


Pour spaghetti sauce on top and sprinkle on Parmesan cheese. 


Bake at 375 for 35 minutes, or until bubbly and cheese has started to brown.
The husband loved it! I tried to get him to eat a spinach salad with it, but I guess that may have been pushing it a bit too far!

Have you check out all the fantastic blog parties on my sidebar? I LOVE all my blog hops, but I have a special place in my heart for the foodies! If you see one on the right that tickles your fancy, please check it out!
And speaking of foodie blog hops, have you checked out my new blog hop? Made From Scratch Tuesday is my new hop to show off all the hard work you put in to creating fantastic dishes from scratch.

Saturday, January 22, 2011

Tomato Herb Bread

It was just a matter of time before I started making bread again. Now that I have my new mixer with a dough hook that puts Captain Hook to shame, I have to test it out, right? I found a recipe in my step daughter's cookbook for white bread. I will shamelessly admit I bought her the latest Better Homes and Garden cookbook for Christmas so I could use it too!


The recipe is below. The items from the cookbook are listed in normal text; what I added is in italics.Some directions have been altered.

  • 5-3/4  to 6-1/4 cups  all-purpose flour (I used 5 3/4 c)
  • 1  package  active dry yeast
  • 1/2 c coarsely chopped sundried tomatoes
  • 1 T dried thyme
  • 1 T dried basil
  • 1 T dried oregano
  • 2 handfuls (technical term) shredded Parmesan cheese  
  • 2-1/4  cups  milk or buttermilk
  • 2  tablespoons  sugar
  • 1  tablespoon  butter or shortening
  • 1-1/2  teaspoons  salt
  • Olive oil for bowls and pans

Directions

1. In a large mixing bowl combine 2-1/2 cups of the flour, tomatoes, herbs, cheese and the yeast; set aside.


In a medium saucepan heat and stir milk, sugar, butter, and salt just until warm (120 degree F to 130 degree F) and butter almost melts.

Add milk mixture to dry mixture. Beat with dough hook on low (stir) speed for 30 seconds, scraping the sides of the bowl constantly.
 Beat on high (4-6) speed for 3 minutes, adding flour in 1/2 c at a time until dough forms one mass in the bowl.


2. Shape dough into a ball. Place in a lightly greased bowl, turning once to grease surface. Cover; let rise in a warm place until double in size (45 to 60 minutes).


3. Punch dough down. (I may have had too much fun with that) Turn dough out onto a lightly floured surface. Divide dough in half. Cover; let rest for 10 minutes. Meanwhile, lightly grease two 8x4x2-inch loaf pans. I used one 8x4x2 loaf pan and one of my mini loaf pans that have cute shapes in the bottom.
4. Shape each portion of dough into a loaf by patting or rolling. To shape dough by patting, gently pat and pinch each portion into a loaf shape, tucking edges beneath. To shape dough by rolling, on a lightly floured surface, roll each portion into a 12x8-inch rectangle. Starting from a short side, roll up into a spiral. Seal with fingertips as you roll.
5. Place the shaped dough in the prepared loaf pans. Cover and let rise in a warm place until nearly double in size (30 to 40 minutes).


6. Bake in a 375 degree F oven about 40 minutes or until bread sounds hollow when you tap the top with your fingers. (If necessary, cover loosely with foil the last 10 minutes of baking to prevent overbrowning.) Immediately remove bread from pans. Cool on wire racks. Makes 2 loaves (32 servings).


See the cute little squirrel on my mini loaf? The bread was so yummy!  I'll probably continue experimenting with different herbs and combinations to see what other concoctions I can come up with. 

Thursday, January 20, 2011

The Cutest Baby Shower Cupcakes

So this week, I made cupcakes for a co-worker's baby shower. Well, I love baking so I was ready to go! I'll warn you now, I'm going to get off track a few times with this story.

I started out making white cupcakes and white frosting. My stand mixer broke during Christmas cookie season, so I made the cake using my hand mixer. I've become super dependent on my stand mixer, so this was like going back to the dark ages for me. But, I survived. Now onto the frosting. I love homemade buttercream frosting. There really is no substitute, well except for "better"cream. That's a story for another day. Anyway, time to make the frosting. I heard a tip a while back that frosting should be made in a food processor. I hadn't tried it out yet, so I figured this would be the perfect time. I tossed the butter in the food processor and let it do its thing while I pulled out the powdered sugar, vanilla and milk. While there should be pictures here, I decided to let you guys use your imagination. (translation: my camera was missing for a day) So the butter is now smooth and creamy. I added in the other ingredients and processed away! OMG! I am never mixing frosting again! It's going in the food processor every time now! Then I get ready to add the coloring. Uh-oh. I'm completely out of the good coloring. All I have is the squeeze bottle junk. Erg. But wait! What's that in the cabinet? My food coloring spray! I heart this stuff. I haven't quite justified buying an airbrush doohicky yet, so this is the next best thing. So I go to town piping the frosting on the cupcakes and spraying them blue. Wanna hear something crazy? Ott,A and I were making cupcakes for the same baby shower. Without talking to each other, WE BOTH SPRAYED THE CUPCAKES BLUE! Crazy, right?

Cupcakes-baked and cooled
Frosting-fully processed and piped onto cupcakes
Decorations....ah, the best part. I made these the night before, so they were all dry and set up.

But what are these awesome little things? I found the recipe at Suzy's Artsy Craftsy Sitcom. Her post is about making your own conversation hearts. I used the same recipe and directions, but instead of cutting out small hearts, I cut out letters spelling "It's a Boy", hearts, stars, circles, and other geometric designs. I stuck toothpicks in some of them so I could stand them in the cupcakes rather than laying them all on top of the frosting.


Here's how they turned out:


And I can vouch for Suzy's recipe. They taste just like conversation hearts! Next time I make these, I'm going to try adding different extracts like orange, cherry and maybe even root beer!

Are you ready for the most exciting news ever?? After using the archaic hand mixer, I had enough. I convinced the husband to let me go ahead and get the mixer I've been drooling over for the last couple of years. I went to the website and ordered my KitchenAid Pro 600 Series Stand Mixer. It arrived Wednesday! As he opened the box and pulled it out, I swear the skies opened up and a choir of angels burst out in heavenly song. I'm pretty sure there was an aura around the mixer too :)
Yes, my friends, I finally got my mixer. I'm sure you'll all be seeing shots of it in posts to come. 

Tuesday, January 18, 2011

Ott,A's Iron Chef Challenge-Pâté

Hi. My name is Jen, and I'm addicted to Food Network.

As if you guys didn't already know, right? Anyway, they're always showing all these foods using parts of the animals that I'd normally throw away. Like today, I watched Chopped and the first basket had goat brains! Yes, you read that correctly...GOAT BRAINS. I'm all about trying new things, but I have to say, I cannot and will not cook brains. That being said, maybe I go a little over board with what parts I will or won't eat, and I recognize that I should broaden my horizons. So, I finally broke down and decided I shouldn't keep throwing away livers just because I think I don't like them. When the meat is processed, they leave the livers in there for a reason. Obviously, at least some people like them. While perusing the internet for recipes using duck liver, I found a few recipes for pâté, all with many different ingredients. I wasn't really sure how so many different ingredients could all make pâté, so I did what any reasonable person does...I searched it in Wiki.

Pâté (French pronunciation: [pɑte]; UK: /ˈpæteɪ/, US: /pæˈteɪ/) is a mixture of ground meat and fat minced into a spreadable paste. Common additions include vegetables, herbs, spices, and wine.

 Ah, problem solved. Basically, it's a meat paste. Real appetizing, right? The problem I had with all these different recipes is I was short an ingredient or two. Then I found one that kind of seemed like a cheeseball with liver instead of chipped beef. So is it pâté? Or liver cheeseball? You decide!


Here's the recipe I started with:
8 oz. liver sausage (liverwurst Braunschweiger)
8 oz. cream cheese
1 clove garlic
2 pinches heavy curry powder
2 tsp. Worcestershire sauce

Thin toast & butter to serve with the pate
Remove the skin from the liver sausage, then put into food processor or mixer with cream cheese and garlic and beat together until they are thoroughly mixed. Stir in  Worcestershire sauce and curry powder. Pack the pate into small dishes and mash the surface of each with the blade end of the knife. Serve with thin toast and butter.

Well, I didn't have liver sausage; I had liver from the 2 ducks I cooked. By the way, here's a pic of duck #2-Pineapple Glazed Duck
The blended pineapple and brown sugar glaze was yummy! Anyway, on with the pate...

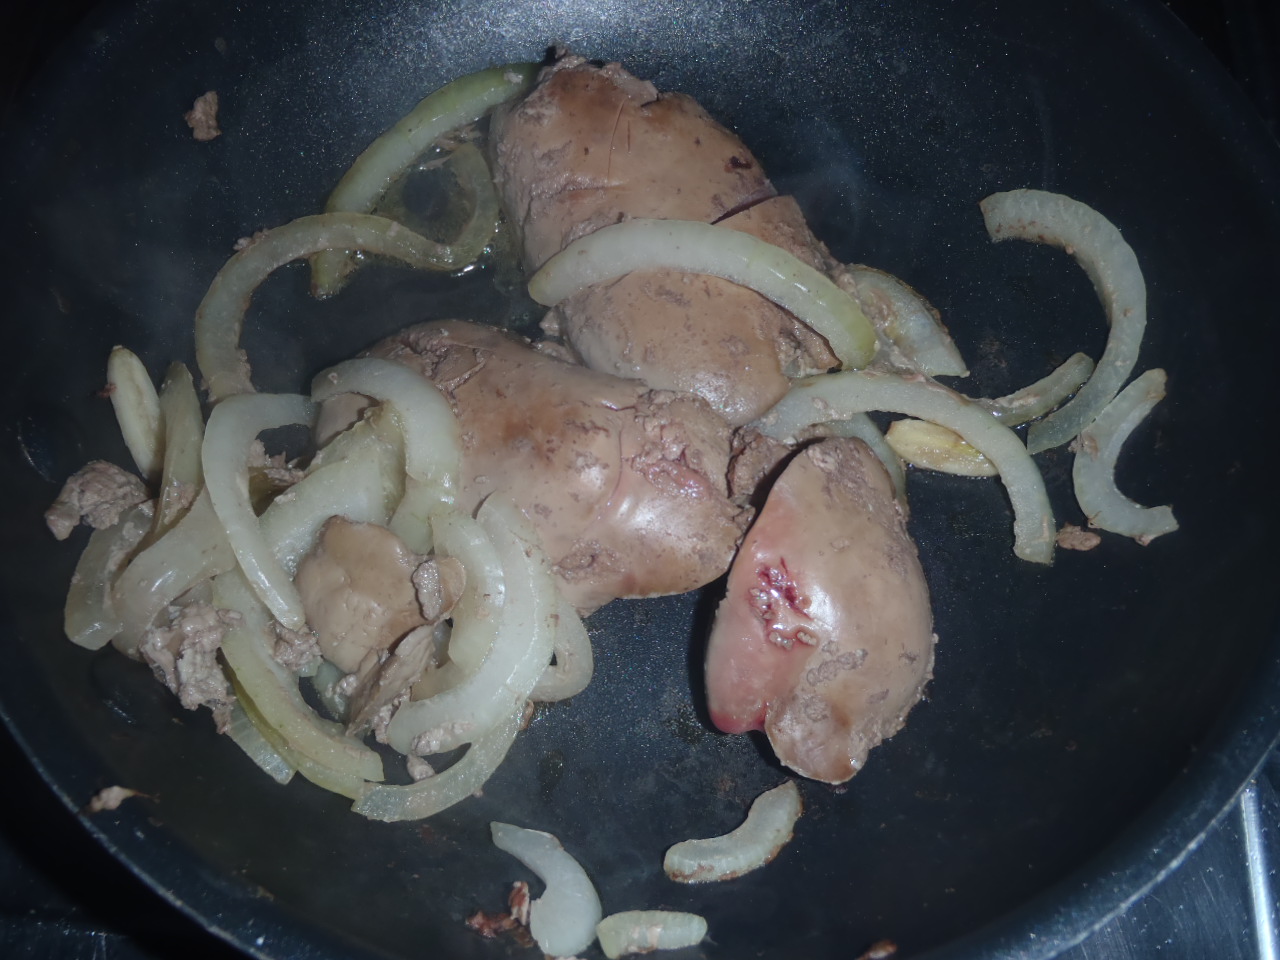
To start, I cooked the livers with about 1/4 of an onion.

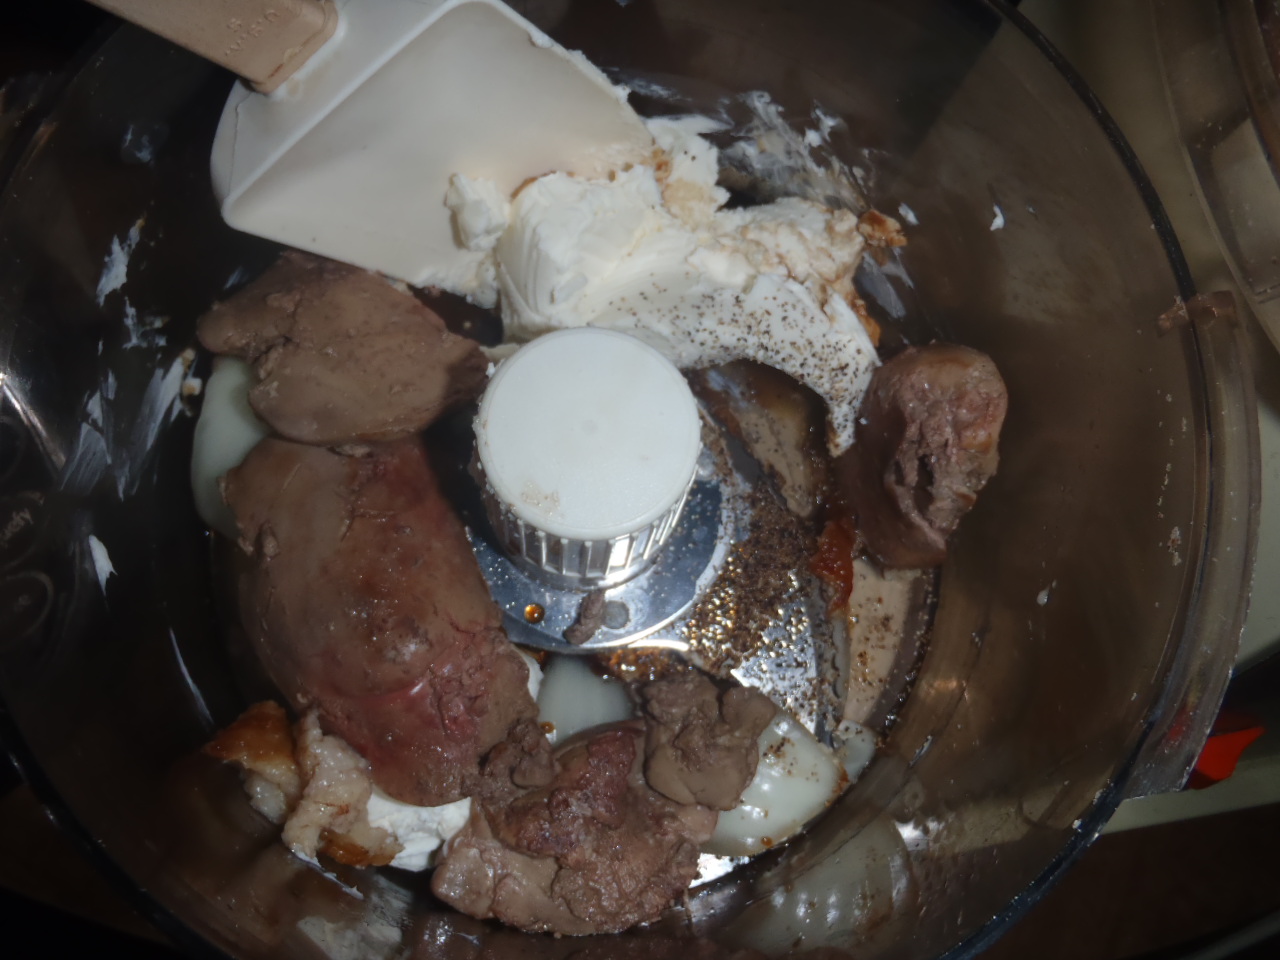
When livers were fully cooked, I tossed out the onions and set the livers on a plate to cool. Meanwhile, I pulled out the food processor and  tossed in the softened cream cheese and clove of garlic. I also added about 1/4 of the onion to give it more flavor. When the livers were cool, I added those in processed away. 


 Mmmm...meat paste. Next, I added the Worcestershire and some salt and pepper. I opted out of the curry. I honestly didn't think the husband would eat it with the curry, but if I told him it was just liver and onions with some cream cheese, he'd be all over it. Now, scrape all this out and set it in the fridge for a while. 

A couple hours later, I pulled out some Italian bread and sliced it thinly. 

Now, pop it into the oven on the "high" broiler setting to get a nice toast. Just a few seconds on each side.
Spread on the pate, and enjoy! 
The husband loved it! I really didn't think it had a bad flavor, I just didn't particularly like it. If someone served it to me and I didn't know it was liver, I probably would have loved it.


Photobucket

Tasty Tuesday