Pages

Saturday, August 28, 2010

Canning Week Wrap Up

c
Did you know that August is National Canning Month? And did you know that Ball celebrated it's anniversary this week? Gee, it's almost like we planned this or something!

It sure has been a great week! We're so glad everyone joined in on the fun. We had lots of great recipes you all shared with everyone. The canning post contest winner is over at Ott,A's page. Congrats to everyone who entered. Whether you're an old pro or a canning newbie, I hope everyone was able to find some useful information here. We'll keep the Facebook page up as a resource for everyone and future Canning Weeks (do I see a sequel coming??).

We had over 300 entries for the fabulous giveaways! And I know you're all waiting for the winners to be announced, so here they are:

Fresh Preserves Starter Kit #1
Congrats to Roberta Bales Davis! Her winning entry came from joining our Facebook page!


Fresh Preserves Starter Kit #2


Congrats to Christy from Frugality and Crunchiness with Christy ! Her comment is from Ott,A's post about Tomato Juice!


Ball Canning Guide

Congrats to Penny from Plate to Plate! Her winning entry came from her Linky Party entry for Canned Tomato Sauce!


Paula Deen's Recipe Journal

Congrats to Katie from Pinke Post! Her winning entry came from posting our badge on her site!
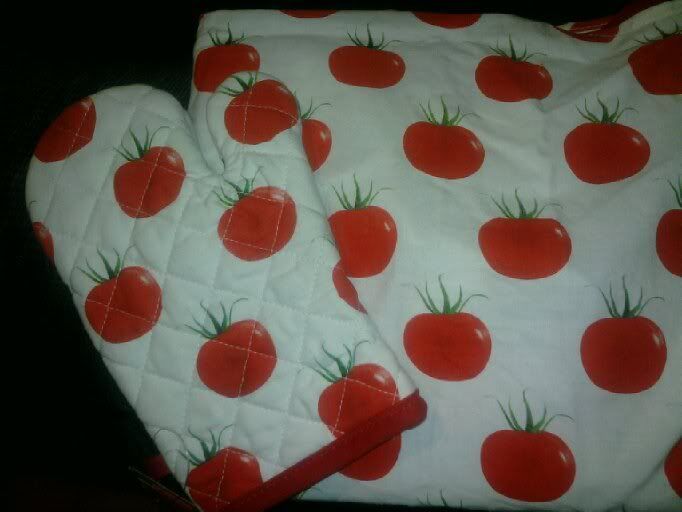

Apron/Potholder Set


Congrats to Siteseer from Where the Road Takes Us! Her comment is on Ott,A's Salsa post.


Winners: Please email me @ jenperfla at gmail dot com with your shipping information so we can get your great prizes sent out.

A HUGE thank you to Jane from Make Ahead Meals for Busy Moms for being our guest judge (and giving out her cookbook to the winner!!!) and promoting our canning efforts.

Make-Ahead Meals For Busy Moms

Don't forget you can also buy her book on Amazon! I just bought a copy for my mom. It was supposed to be a surprise, but if she reads this, then I guess she'll know it's coming!

 I hope everyone enjoyed this as much as we did!

Friday, August 27, 2010

Jalapeno Jelly

It's the last day of Canning Week...kind of bittersweet. I'm ready to get back to my regular blog, but we've had so much fun sharing our canning recipes, tips, and stories. When you're done here, make sure to check out Ott, A and her post!
Jalapeno Jelly?! Yes, you read that right. For those of you who have not tried it, it's really much better than it sounds.

What you'll need:
12-15 medium to large jalapenos
2 packages liquid pectin
2 cups apple cider vinegar
6 cups sugar


First, stem and seed peppers. Place peppers into blender with 1 cup vinegar and run on chop setting until no large chunks remain.
Photobucket

Pour into large pot and add other cup of vinegar and sugar. Bring to a hard boil and boil for 10 minutes.

Photobucket

Add two packages of pectin and boil for one minute. Here's a handy trick I learned. Cut off the tops of your liquid pectin and stand them in a glass, or in a measuring cup. Because timing is so critical in jellies, this will really help!

Photobucket

Remove from heat, skim off any foam, and pour into jars, leaving 1/4" head space. Wipe rims, apply lids and rings. Process for 10 minutes in water bath.

Now that you have tons of it, what are you going to do with it? I prefer to eat this on wheat crackers with some cream cheese. Leave a comment below telling us how YOU like jalapeno jelly. 

Don't forget about the GIVEAWAYS this week! Today is the last day to get your chance to win. (I will take entries until 11:59 p.m. EST Friday-please note the linky contest will end at 4 p.m. today) Here are the ways to get your entries in:

  • One entry for joining our Facebook page
  • One entry for linking up in our Linky Party blog post contest (AND you'll get entered to win an awesome cookbook, which you can also buy on Amazon--makes a great gift)
  • One entry for commenting on one of my posts
  • One entry for commenting on one of Ott, A's posts
  • One entry for putting our "Canning Week" button on your blog (please comment and let me know you did)
  • One entry for Tweeting on Twitter (please comment and let me know and use "canning" as a tag) 
Remember those awesome prizes from earlier posts? Well, courtesy of Fresh Preserves, we now have TWO canning starter kits to give away!!

    Thursday, August 26, 2010

    Peach Honey

    When you're done here, make sure to check out Ott, A and her post!
    Have you canned something? Did you link up to our Linky Party? There's a great prize for the winning post!

    While you were peeling away making peach marmalade, did you save the skins? If you did, now you can make peach honey! I got the instructions for this while I was chatting with the folks at Adrian's Orchards. For some reason, I think they must have left out some old family secret because mine didn't turn out exactly the same as what they sell, but it's still darn tasty!


    To preserve skins, put in bowl and cover with wet coffee filter and refrigerate.

    Photobucket


    You'll need at least two cups of peach skins. The more you use, the more peachy it will be.

    In small pan, put in peach skins and add enough water so the peach skins are completely covered. Bring to a boil and them simmer for 20 minutes, or until the peach skins are soft and fall apart when touched. To get peach juice, strain using a cheesecloth. Or, you can pour it through a coffee filter.

    If you don't have much juice at this point, add in some peach juice or apple juice until you have at least 3-4 cups. Return juice to pan and add half as much sugar as you have juice. So if you have 4 cups of juice, add 2 cups of sugar. Boil until it has the consistency of honey. I tested it out by dripping it onto a plate. Mine seemed to be taking forever to thicken up, so I cheated and added a little pectin; about a teaspoon of the powdered kind.

    When it's the desired consistency, pour into jars, leaving 1/4" headspace, and process for 5 minutes.
    Photobucket


    What's that below?? Those are MORE of the prizes we're giving away! We have a matching apron/potholder set and Paula Deen's Recipe Journal! How do you get your entries in?
    • One entry for joining our Facebook page
    • One entry for linking up in our Linky Party blog post contest (AND you'll get entered to win an awesome cookbook, which you can also buy on Amazon--makes a great gift)
    • One entry for commenting on one of my posts
    • One entry for commenting on one of Ott, A's posts
    • One entry for putting our "Canning Week" button on your blog (please comment and let me know you did)
    • One entry for Tweeting on Twitter (please comment and let me know and use "canning" as a tag) 
    Make sure you comment and let me know about your tweets and if you added our button to your page!


      Wednesday, August 25, 2010

      Applesauce/Apple Butter

      When you're done here, make sure to check out Ott, A and her post!
      Don't you just love the smell of apples and cinnamon? Oh, it makes the house smell so good! We love taking the kids out to the apple orchard and picking our own apples.


      So what do you do with all those apples you picked? The possibilities are endless! Here's a recipe to use those apples in a couple of different ways.

      We start out by making applesauce.

      What you'll need:
      Apples
      Cinnamon
      Apple Juice

      Start out by cutting the apples into slices and remove the hard, inner cores. In a large pot, put in about an inch of apple juice. Add the apples and cinnamon to taste. I usually do a few shakes of the cinnamon shaker, then add more as it cooks if needed. Cook over medium heat until apples are soft.

      Photobucket


      A lot of people prefer to take the skins off at this point using a food mill, or sieve/grinder. But while I was on vacation in Nashville, Indiana I went into one of the country stores. The kind where the little old lady who was probably around when Johnny Appleseed came to town is in the back with the big kettle making the apple butter right there. Anyway, their apple butter was so delicious and she told me the secret was NOT to remove the peel. Who'd have thought? Since then, I always leave it on.

      Next, I put the apples in the blender, filling it about 3/4 of the way full, and run it on "Chop". At this point, you have applesauce. Now, you can fill your jars and seal.

      Photobucket


      OR....make apple butter!
      To make apple butter, pour your blended apples into the crockpot. Add one cup sugar to every four cups of apples. Then add cinnamon, allspice, and cloves. Start out with a little bit of each and taste, adjust accordingly. The applesauce will need to cook for several hours, about 12 hours for a full crockpot. You don't need to worry about stirring it. After about 4-6 hours of cooking, add more sugar, at half the rate as before. So if you originally added two cups of sugar, add just one cup this time. Stir in the sugar and continue to cook. If your slow cooker has "hot spots", you will need to stir occasionally. After 10-12 hours of cooking, you're ready to pour into jars and seal.

      To seal applesauce or apple butter, fill jars within 1/4" of top, wipe down rims and apply lids and rings. Place in boiling water for 15 minutes for pints or 20 minutes for quarts. Let cool overnight and make sure jars have sealed properly.

      Tuesday, August 24, 2010

      Peach Marmalade

      It's Canning Week Day 2! Aren't you excited??!! I know I am! 

      When you're done here, make sure to check out Ott, A and her post!

      What is Canning Week? Well, Ott, A and I each do lots of canning. We love capturing the fresh taste of home grown goodies to enjoy throughout the year. We'll each have new posts every day this week, so be sure to come back and visit! We will also have an awesome giveaway! Make sure to check out Ott, A for her posts each day. 


      Peach Marmalade


      In my opinion, Indiana peaches are some of the best. I get mine from Adrian's Orchards in Indianapolis. They have lots of yummy produce and homemade goodies.
      Photobucket

      Here's what you'll need:

      4 lbs of fresh peaches, peeled and diced (save the peels! you'll need them on Thursday)
      1 orange
      1 lemon
      5 cups sugar
      1/4 c water
      1 package powdered pectin (1 3/4 oz)

      7 or 8 half pint jars and lids (Sterilize first!)

      Cut orange in quarters, remove seeds, cut off rind and slice into very thin pieces. Repeat this with the lemon.

      Photobucket

      Put orange and lemon slices in small saucepan with 1/4 c water and simmer, covered, over low heat for about 20 minutes.

      In large pot (at least 8 quart), fill with diced and peeled peaches and orange/lemon mixture. When it's at a full rolling boil, stir in pectin and bring to a full rolling boil once again. Stir in sugar, stirring constantly!!

      Photobucket

      Boil hard for one minute and remove from heat. SKIM OFF ANY FOAM! This is very important.

      Photobucket

      Pour into jars and seal. To seal, process 5 minutes in boiling water bath.

      Photobucket

      There's plenty more to come with our first Canning Week. Check back daily for new posts, and don't forget to check out Ott, A !

      For more information on Canning Week and all the giveaways, please see this post.


      Calling all local food enthusiasts and people who just enjoy great food!
       Are you close to Indianapolis?  How would you like to win two free tickets to Dig-IN? The great news is I have two tickets to give away! All you have to do is leave me a comment saying you'd like to be entered in the Dig-IN giveaway. That's it!!
      What is Dig-IN?
      Here's information from their website:


      Purpose and Mission:
      If there is a heart in Heartland, we're it. And if there is bread in the nation's breadbasket, it probably came from us. Indiana has a long and proud agricultural heritage, and we plan on continuing that heritage the same way it began.
      On August 29, 2010, Indiana growers will make their way to White River State Park to showcase their high quality locally produced products, and remind Hoosiers there is much more than corn in Indiana. Dig-IN will feature educational discussion panels, cooking demonstrations, urban gardening exhibits, local chef Q&A sessions, wine tastings, beer and food pairing classes, and much more. Combining the freshness of farmer's markets and our state's greatest food minds, this event promises a feast for the senses. Prepare to learn from Indiana agricultural and culinary experts as they invite you on a journey from field to table top. Don't miss the opportunity to help us celebrate all that Indiana agriculture has to offer. See you in August!

      It's a great showcase for local foods and talent. If you've never been, I hope you sign up for the giveaway. Even if you don't win, here's how you can score your own tickets.

      Monday, August 23, 2010

      Jar Lanterns

      This post was linked to some of the parties shown here

      When you're done here, make sure to check out Ott, A and her post!
      So if you're like me, during the winter months you're starting to accumulate all those empty jars from those wonderful things you canned over the summer. Here's a quick and easy craft to do with them until you're ready to use them again.

      What you'll need:
      Empty jars
      Washable glue
      Tissue paper
      Ribbon
      Flameless candle

      Cut out (or rip) pieces of various colored tissue paper.
      Apply glue to glass jar.
      Gently press tissue paper pieces onto jar and let dry.
      Glue on ribbon to rim of jar and any other embellishments you would like.
      Drop in flameless candle!


      We did ours for Christmas, but you can also do these for Halloween by using orange and black tissue paper and gluing foam witches, ghosts, black cats, etc to them! When you're done with them, pull off everything you can, then drop jar into hot, soapy water to remove glue and tissue paper.

      Don't forget about the GIVEAWAYS this week! Here are the ways to get your entries in:

      • One entry for joining our Facebook page
      • One entry for linking up in our Linky Party blog post contest (AND you'll get entered to win an awesome cookbook, which you can also buy on Amazon--makes a great gift)
      • One entry for commenting on one of my posts
      • One entry for commenting on one of Ott, A's posts
      • One entry for putting our "Canning Week" button on your blog (please comment and let me know you did)
      • One entry for Tweeting on Twitter (please comment and let me know and use "canning" as a tag)

      Canning Basics and Resources

      When you're done here, make sure to check out Ott, A and her post!
      I know many people who are afraid of canning, or don't see the benefit of canning something that is readily available at any super center. Here are some of my thoughts on that:

      1. When done properly, there is very, very little risk of food poisoning.
      2. It's EASY!
      3. Things always taste better when you've put your blood, sweat, and tears into them. (Well, make sure to keep all bodily fluids outside of the jars)
      4. It's a great way to get your kids involved in the kitchen. Then later when you're eating those home canned foods, you can remind them of the fun time they had helping you make it.
      5. You know what's in your food.
      6. Are  you really going to use the 342 cucumbers from your garden before they go bad?
      7. If you have a brown thumb, then you can buy the products from your local farmer's market and support the local economy.
      8. By canning locally grown products, you're capturing the regional flavors of produce. For anyone who thinks all strawberries taste the same, they've clearly never experienced the difference. Trust me, there is!
      9. It's cheaper. Once you get all your start up costs taken care of, foods can be canned for pennies.
      10. Home canned products make great gifts.

      Supplies:
      I use the water bath method, so I purchased a large pot with a lift out rack. ($13)

      Photobucket

      Jars ($6-$8 per dozen jars...which are reusable)
      Replacement lids ($1 per dozen)

      Miscellaneous extras for recipes:
      Pectin ($1.88 for 2 boxes)
      Sugar ($10 for 25 lb bag-yes, I do buy it in bulk)

      You can do the math and see how much we save by home canning!


      I've compiled a list of resources to help you even more

      http://www.doityourself.com/stry/whycanfoods

      http://www.pickyourown.org/

      http://www.aces.edu/pubs/docs/E/EFNEP-0190/


      http://www.aces.edu/counties/Baldwin/CanningQuestions.php

      Whether you're an old pro, or have never canned, we hope you enjoy this week's adventure and share your recipes on our linky party!

      Sunday, August 22, 2010

      The Wait is Almost Over!

      Canning Week officially kicks off tomorrow! Aren't you excited?!

      Here's some info you may need:

      Giveaways (recipe books, kitchen needs, canning starter kit, and more)


      • One entry for joining our Facebook page
      • One entry for linking up in our Linky Party blog post contest (AND you'll get entered to win an awesome cookbook, which you can also buy on Amazon--makes a great gift)
      • One entry for commenting on one of my posts
      • One entry for commenting on one of Ott, A's posts
      • One entry for putting our "Canning Week" button on your blog (please comment and let me know you did)
      • One entry for Tweeting on Twitter (please comment and let me know and use "canning" as a tag)
      Winners will be announced Saturday, August 28.

      Monday will feature Canning Basics and Crafty ideas, so make sure all you crafters don't miss out on this!

      Tuesday through Friday will be canning recipes for fruits and veggies.


      Photobucket Photobucket

      Photobucket Photobucket

      Make-Ahead Meals For Busy Moms

      Friday, August 20, 2010

      Guest Post: Urban Gardener

      Meet Audrey:
      She's a 20-something insurance professional who lives life adventure to adventure. (She's also the one who tilled my garden, but that's a story for another day.) She enjoys being active, whether you define that as biking through Indianapolis or knitting on her couch. You simply won't find her sitting still. She enjoys seeking out the beauty others overlook or dismiss. This year, Audrey decided to set out on a new quest, cultivating a garden on the small patio of her lakeside apartment. Keep reading to see what she planted, harvested, and most importantly learned in the patio planter experience!


      The Urbanization of the Vegetable Garden

      I'm an apartment person. I don't particularly care for mowing grass or replacing garage door openers. I do, however, love fresh produce and I cook primarily from scratch. As we all know, there's a huge difference between the produce department in a grocery store and the local farmer's market, but there's nothing better than food grown with your own love, a little sweat, and maybe a tear or two.

      But how can I grow my own juicy tomatoes and spicy chilies...and maybe strawberries? Hmmm...

      Then my boyfriend's mother brought me an upsy-downsy tomato planter. Plants in containers! It makes so much sense I don't know how I didn't think of it before now. Then it occurred to me that I could grow many things in containers. I did a little reading online for some tips.

      I started with the grape and big red tomato seeds as well as basil, chives, cilantro, jalapenos and a packet of assorted bell peppers. I bought some cheap pots and found some free pots that I could poke holes in (I even had chives in a pizza express cup that's been moving around with me since college).


      This was getting fun. I love to be able to nurture things. So I wait. I went to my local farmers market to pick up some veggies one day and the proprietor asks how my pots are coming along and casually mentions that his starters are on clearance. $2 a flat! I'm going to need more peppers, and some roma tomatoes are a given, so let's see what's over there. I picked up some dusky eggplant, several healthy looking cayennes, a few more bell peppers, some cherry peppers, okra, and some squash and zucchini plants that I wasn't so sure about. I even grabbed a cantaloupe plant just to see if it could work.

      The upsy-downsy tomato idea had already been scrapped. The bucket just isn't big enough, but it's perfect for cayenne's and cherry peppers.


      I chose the healthiest starters I could find and stuck them in buckets hoping for the best, my mouth water at the thought of fried okra.

      One of the most important things to consider when planting an urban container garden is that the nutrients in the soil are quickly depleted. I used miracle grow and bought an organic pesticide for the aphids. The best part of container gardening, in my opinion, is the lack of furry thieves leaving half-eaten tomatoes around...well, besides my dog. He thinks green tomatoes are tennis balls. I also had some casualties due to the notorious Indiana summer storms. Next year I'll find a way to weigh down the buckets more.


      As for the results? I have more jalapenos than I know what to do with. I've made some killer dips and my famous poppers with them. I have tons of fresh tomatoes and what I can't eat immediately either get turned into tomato sauce or sundried tomatoes. I've made pesto with the basil and I love having fresh herbs always on hand. Plus I'm saving a fortune. The eggplant never set fruit so I think I'll try another variety next year. Mildew killed my squash and zucchini, but I didn't think they'd make it when I bought them. I lost interest in my cantaloupe when it overtook my balcony and I just kind of let it go. The assorted bell peppers are gorgeous and one of the plants is producing a beautiful purple fruit that's just a little sweeter. Oddly, they turn green when you cook them.


      Summer is coming to an end now and soon the plants will wilt, but I'm planning for next year already. I'm hoping to score a habenero plant and I'll probably try some other tomato varieties. I intend to grow more romas because I absolutely love them. I had so much success with the peppers that I'll be sure to grow them again as well and I can't imagine buying those blister packed herbs ever again. I'm also hoping to grow some green beans and garlic, and I'm going to give squash and zucchini another shot, but from seed this time.

      So in closing, if you think you can't have home-grown veggies in a cramped space, why not become an urban gardener? It's a fun and rewarding project and my veggies rival the ones at produce stand down the street.


      This post was linked to some of the parties shown here


      Canning Week is coming! August 23-27 is canning week here and over at my blogger buddy's page here. We'll be having a linky party, recipes, tips, tricks, and GIVEAWAYS!!! See the button on the right? Go ahead and slap that on your blog and let me know so you can get your entries in early. We're also on Facebook! Join up to our group for an additional entry!

      Thursday, August 19, 2010

      Grilled Apples

      This post was linked to some of the parties shown here

      Canning Week is coming! August 23-27 is canning week here and over at my blogger buddy's page here. We'll be having a linky party, recipes, tips, tricks, and GIVEAWAYS!!! See the button on the right? Go ahead and slap that on your blog and let me know so you can get your entries in early. We're also on Facebook! Join up to our group for an additional entry!

      If you saw Wednesday's post, then you know we have a ton of apples. Most of them we used to can some yumminess! In just a few days, you'll be able to see it during CANNING WEEK!!! But we did hang on to a few for some other goodies. Last night, since it had finally dropped below 90000000 degrees, we pulled the grill out and had some juicy steaks, baked potatoes, and grilled apples. Think apple pie without the crust.

      To begin, wash the apple and cut out a bit of the core at the top. You'll want to cut down about an inch and a half.

      Next, put a pat of butter inside the apple.


      Then top with some cinnamon and a bit of sugar.


      Wrap tightly in foil and grill until tender, but not mushy.


      When you take it off the grill, if it's not too mushy, you'll be able to cut it in slices and core it without it falling apart.


      Serve hot with your other grilling goodness!


      Wednesday, August 18, 2010

      Not So Wordless Wednesday

      This post was linked to some of the parties shown here

      Canning Week is coming! August 23-27 is canning week here and over at my blogger buddy's page here. We'll be having a linky party, recipes, tips, tricks, and GIVEAWAYS!!! See the button on the right? Go ahead and slap that on your blog and let me know so you can get your entries in early. We're also on Facebook! Join up to our group for an additional entry!

      Wow! We're less than a week away from Canning Week!!! I'm so excited I could almost pee my pants!!! We are ready to go!!

      Here's Thing 3 and Thing 4 picking apples:


      Yes, I let the 6 year old play with cut with my self sharpening knives!!


      And we have our Giveaways Ready!!!! (This is only PART of our giveways--There are MORE)


      All the excitement starts MONDAY! Mark your calendars! Grab our buttons! Hold on to your seats! Canning Week is coming!!!


      Photobucket

      Photobucket


      Photobucket


      Photobucket